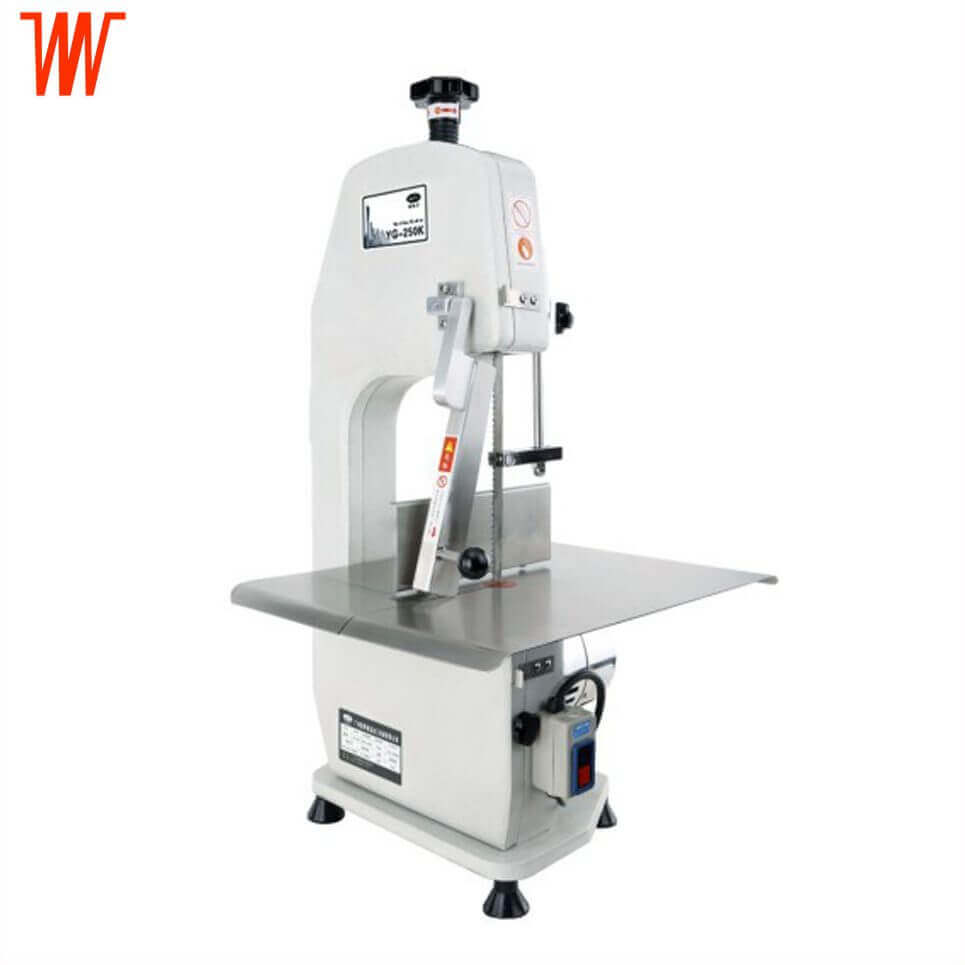
The use of instructions and precautions:
1. Check that the power supply voltage should meet the specified requirements. The power supply wiring should be firm and reliable, and the power socket should be firmly grounded.
2. Where there is no power outlet with a plug, it should be connected to a full-stage disconnect device with at least 3mm contact opening distance installed by the user in a fixed position. The breaking device rated current should be greater than or equal to 35A.
3. The machine must be placed on a level surface or on a table top. The level of the fuselage can be adjusted by the following one foot;
4. When the saw band needs to be installed, open the door and remove the long lever handle on the workbench. The band saw blade teeth are mounted forward on the pulleys, and the teeth are all trapped in the grooves.
5. Tighten the saw band by turning the knob on the right side of the column in the direction of the sign. The tension of the saw band is adjusted to the fact that the saw bone does not slip. The over-tightening affects the life of the saw band. If it is too loose, it will not work properly.
6. Adjust the adjusting bolts on the back side of the upper box and the column (located in the box body respectively), adjust the tilting and tilting angles of the two driven saw pulleys, so that the sawing belt does not fall off when the machine is tested, and the saw belt back does not match the limit bearing. Until friction occurs. Rotate the adjusting bolt clockwise, the saw pulley is tilted back, the saw pulley is tilted back, the adjusting bolt is rotated counterclockwise, and the saw pulley is tilted forward.
7. Check that the two scrapers in the lower box should fit snugly against the saw band.
8. Close the door and the machine will start normally.
9. Commissioning: Start and observe that the saw band should run in the downward direction.
10. Use the mobile workbench for sawing the entire animal. Saw small pieces of meat, ribs can be selected using the pusher bar and thickness adjustment plate, and the workbench can also be fixed using the pins under the table.
Note: When using the mobile workbench, be sure to remove the pusher on the nose to avoid obstructing work or causing unnecessary collisions!
11. After the machine is started, please use the workbench or the pusher to push the boring. It is strictly forbidden to push materials by hand or other objects to avoid danger!
12. After the machine is started, the saw belt does not move. Check whether the protective cover is tight, whether the saw belt is slippery, whether the line is in poor contact, and the repair is carried out in a targeted manner.

Maintenance:
1. Clean the machine once before each use. Wash the saw band and each working part with clean water, carefully clean the machine after use, open the cover, clean the bone residue and minced meat at the work table, pulley, meat residue collection box, etc. to ensure food hygiene.
Note: This machine should not be rinsed directly with water.
2. The long-term use of the saw band may cause wear or damage. Please replace the saw band regularly. If you replace the saw band, please use the original accessories.
3. The power must be turned off before all maintenance work. Note: The saw band is a consumable part and is not covered by the warranty.


Meat Slicers
14″ Electric Stainless Steel Semi Automatic Meat Slicer Machine 360T
Meat Slicers
12″ Electric Stainless Steel Semi-automatic Meat Slicer 300T
Meat Slicers
10″ Kitchen Tool Electric Semi-automatic Slicer 250T
Meat Slicers
8″ Semi Automatic Meat Slicer 220T
Meat Slicers
13″ High-end Fully Automatic Beef Meat Slicer Machine 320KRS
Meat Slicers
12″ Fully Automatic Meat Slicer Machine 300KRS
Meat Cutter
304 Stainless Steel Meat Cutter Machine QE 500kg/H
Meat Slicers
13″ Table Top Frozen Meat Slicers 320KF
Meat Slicers
12″ Table Top Frozen Meat Slicer 300KF
Meat Slicers
14″ Commercial Automatic Meat Slicer For Sale 360KTS
Meat Slicers
13″ Commercial Automatic Meat Slicer 320KTS
Meat Slicers
12″ Electric Meat Slicer Supplier 300KTS